
Enabling encrypted connections on a server is a bit like weaving a magic spell: nothing works until you get the incantations exactly right, but once you do, everything clicks into place and you have established a secure connection to your server. Configuring encryption can get even more arcane when you also use cryptography to authenticate clients on connection.
Enabling secure connections to a server should be a part of every developer’s repertoire, so in this post we will walk you through an easy three-step process to turn on, test and configure encrypted connections between Redis Enterprise Cloud and a Python client using SSL.
If you’d like to play along at home, you’ll need to get the following tools – we’ll wait while you install them:
Your Redis Enterprise Cloud subscription must have the SSL feature enabled to use SSL. If your account isn’t already enabled for SSL, you will need to contact the Redis support team to enable SSL for your subscription. You’ll find a link to contact the support team in the main menu of your account dashboard.
The documentation for setting up SSL can be found in the Redis Enterprise Cloud Operations and Administration Guide, but in this post we’re going to walk you through all of the steps necessary to use SSL with Python clients. Steps one and two happen to apply to any language, and we’ll refer back to them in a future post about Java.
SSL, or Secure Sockets Layer, is a standard protocol for securing connections between a client and a server. SSL uses encryption to ensure that any data transmitted between the client and server remains private. SSL also uses public-key cryptography to authenticate both the client and the server. Cryptographic authentication is optional, but is almost always required of the server. TLS (Transport Level Security) is the successor to the SSL protocol and serves the same function.
The acronym “SSL” is used informally to refer to either SSL or TLS-secured connections. The documentation and the management UI for Redis Enterprise Cloud follow that convention. In this post we are going to follow the documentation convention and use “SSL” to refer to both SSL and TLS.
As of June 2018, Redis Enterprise Cloud uses TLS version 1.2 to secure connections between the database and the server.
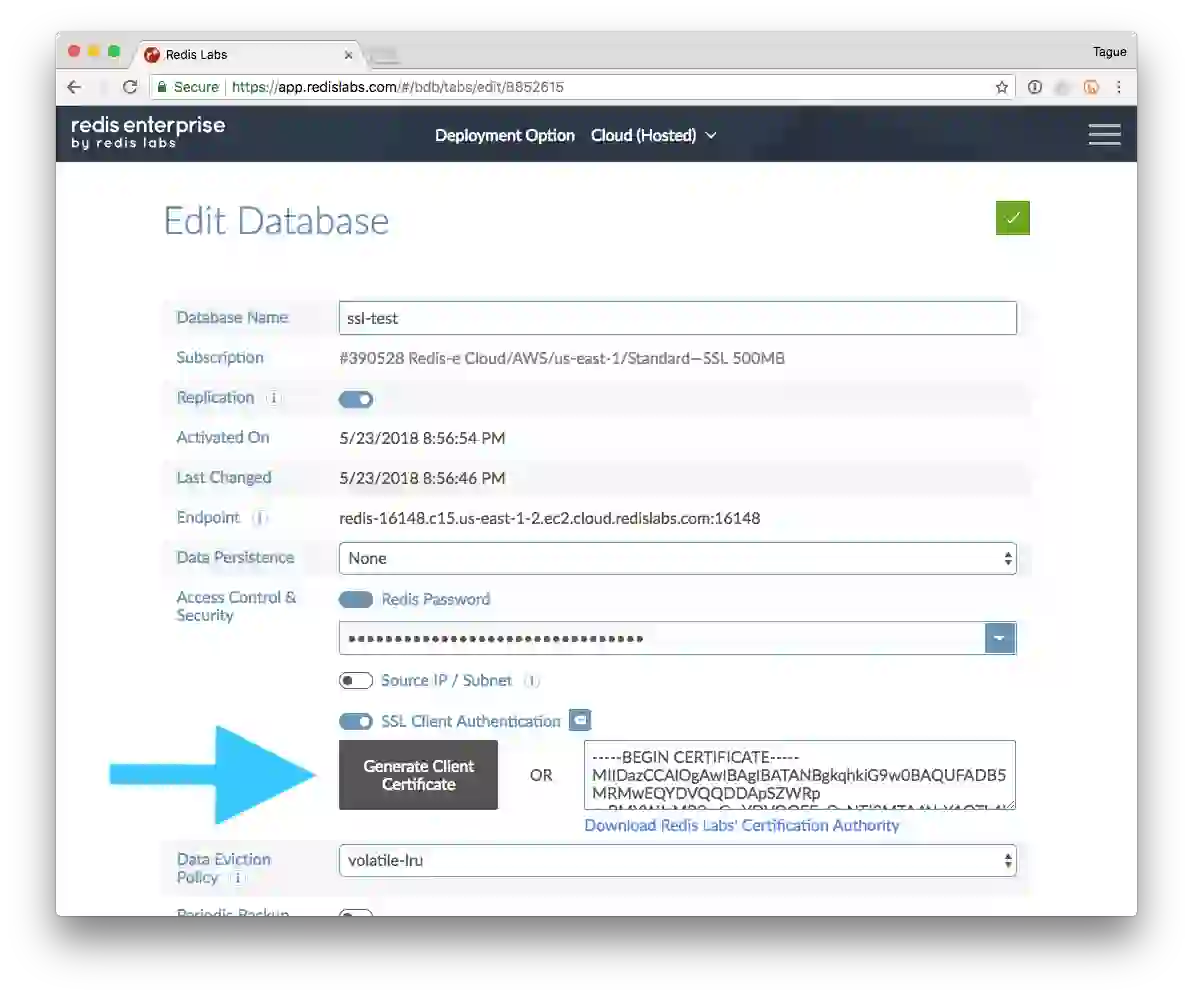
Naturally, the first step in using SSL with Redis Enterprise Cloud is to enable SSL for our database. Start by logging in to your Redis Enterprise Cloud account and creating a new database you can experiment with. As you step through the database creation process, you will get to the Create Database page. Once you reach the Create Database page (you can also turn on SSL from the Edit Database page as well), find the Access Controls & Security group and enable SSL Client Authentication.
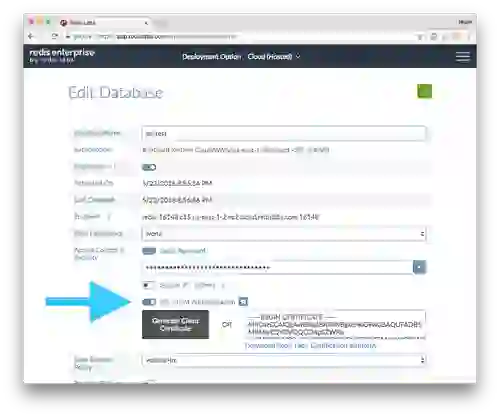
Client Authentication (sometimes shortened to Client-AUTH) is an optional part of the SSL specification which requires the client, in addition to the server, to authenticate via public-key cryptography. Although it is an optional part of the TLS protocol, Redis Enterprise Cloud requires Client-AUTH to use SSL. Once SSL Client Authentication is enabled, your client software will need to authenticate with both a password and a public-key. In SSL, public-key information is exchanged via digital certificates.
As part of enabling SSL Client Authentication, we can have Redis Enterprise Cloud generate a certificate for our client. Press the Generate Client Certificate button and the system will generate a certificate for your client. Pressing the button will also cause your browser to download a zip file (redis_credentials.zip) of credentials and will populate an PEM version of your client’s certificate in the “Client Certificate” field.
 You can think about the certificate created for your client as a digital ID that it can use to prove its identity. The certificate is digitally signed by the organization issuing the certificate to ensure that it hasn’t been modified.
The redis_credentials.zip file contains a copy of all the files necessary to mutually authenticate the client and server. This archive includes the certificate generated for your client (redis_user.crt), the corresponding private key (redis_user_private.key), and a copy of the certificate for the Redis Certificate authority (redis_ca.pem). Special care needs to be taken with both the redis_credentials.zip file and the redis_user_private.key to ensure the security of your keys. All three of these files will need to be distributed out to every client that connects to this particular Redis database instance, so you will want to integrate them into the system you use to manage credentials for deployed software.
Setting up an SSL connection for a new piece of software can often be a frustrating experience; nothing works until you get all the components in place, but then everything just works. It doesn’t help that SSL problems are, somewhat by nature, hard to debug. After all, the protocol is designed to prevent you from knowing what’s going across the wire! So prior to using SSL with our client code, we’re going to test that we can establish a secure connection to the database using the OpenSSL s_client command.
Using the credentials from redis_credentials.zip that you downloaded in step one, run the following command in the directory where you placed the extracted files:
openssl s_client -host [endpoint name] -port [endpoint port number] -cert redislabs_user.crt -key redislabs_user_private.key -CAfile redislabs_ca.pem -crlf
Get the endpoint name for the host parameter and the endport port for the port parameter from the database you used in Step 1. Using this command, OpenSSL will attempt to establish a secure TLS connection to your Redis instance and print the certificate presented by the server. Running the command will produce a long sequence of output about various aspects of the TLS connection with a message at the end that looks like:
Verify return code: 0 (ok)
If you see any other return code or message, the connection wasn’t able to establish securely.
If you aren’t able to establish a secure connection, make sure you correctly enabled TLS Client Authentication on your database instance and that you have the appropriate credentials files downloaded for the instance that you are connecting to. Once you can successfully connect to your database using OpenSSL, then enable SSL for your client. Trust me—don’t skip this step!
The final step is to modify your client code to establish SSL connections. We’re going to build a sample client in Python to establish a secure connection to our Redis Enterprise Cloud instance. Our sample client will connect to the database and run the Redis INFO command. The code for our client is here:
#!/usr/local/bin/python3

import redis
import pprint

try:
  r = redis.StrictRedis(
    decode_responses=True,
    host='redis-16148.c15.us-east-1-2.ec2.cloud.redislabs.com',
    port=16148,
    password='sekret',
    ssl=True,
    ssl_keyfile='./redislabs_user_private.key',
    ssl_certfile='./redislabs_user.crt',
    ssl_cert_reqs='required',
    ssl_ca_certs='./redislabs_ca.pem',
    )

  info = r.info()
  pprint.pprint(info)

except Exception as err:
  print("Error connecting to Redis: {}".format(err))
Our client code is nearly identical to the version that doesn’t use SSL, we only need to add five additional arguments to our StrictRedis constructor: ssl, ssl_keyfile, ssl_certfile, ssl_cert_reqs and ssl_ca_certs. The first parameter, ssl, simply enables SSL on the connection. The remainder of the parameters are used to supply the credentials needed to mutually authenticate the client and the server. Be sure to note that you still have to supply the instance with a password, which can be found on the Edit Database screen.
The redis-py client uses the Python 3 ssl package to provide an SSL wrapper for the standard socket connections to Redis. Under the hood, the parameters prefixed with “ssl” are keyword arguments that map to arguments of the ssl.wrap_socket method. Detailed documentation of the parameters can be found in the ssl package documentation.
The credentials that the client needs to authenticate itself—its certificate and private key (which we downloaded in part one)—are provided to the SSL library using the ssl_keyfile and the ssl_certfile parameters. The Python SSL library works directly with the PEM file formats generated by Redis Enterprise Cloud.
The ssl_cert_reqs parameter translates into a value for SSLContext.verify_mode and controls how the server must be authenticated. This parameter can take one of three different values: none, optional, or required. You should always run with ssl_cert_reqs set to required when working with Redis Enterprise Cloud. The SSL library, by default, uses the certificates shipped with the operating system (which includes all the major certificate authorities) to validate servers. Since Redis maintains its own certificate authority, you need to provide the SSL library with the certificate for Redis’ Certificate Authority (redis_ca.pem), so the SSL library can verify the server identity.
Once the StrictRedis constructor is changed to set up SSL and load all of the credentials needed to verify the client and server, you can run the code and see how it connects to the database. As an experiment, try removing the ssl_keyfile and ssl_certfile parameters and see how the script fails to authenticate. After that, add back the ssl_keyfile and ssl_certfile parameters and remove the ssl_ca_cert parameter and see how the client responds this time.
Configuring redis-py to use SSL is not particularly difficult, but it can be maddening the first time you walk through it. SSL is designed to keep your communications secure, so you may keep getting errors (and seemingly no progress) until everything is set up just right.
Hopefully this post provides you with a gentle introduction to the components needed to set up a secure connection to Redis Enterprise Cloud and add SSL to your projects. In a follow up post, we’ll walk through setting up a secure connection between Redis Enterprise Cloud and a Java client.
A final heads up: many organizations have specific policies around security and managing credentials like these, so please be sure to work with your operations or security team to ensure that you’re following all applicable policies.